🌍 Join the Global Mesh Network
Add a node to a growing worldwide community of mesh networking enthusiasts! Every node strengthens the network and brings us closer to a decentralized communication future.
Get Your Hardware
Start with the same proven hardware we use here
We recommend starting with the same type of node you experienced here at the makerspace - reliable, affordable, and well-supported by the community.
📡 Your First Node
The same hardware powering PUNK and CATZ!
Perfect for beginners: We recommend a Heltec WiFi LoRa 32 V3
with a battery and case (note: some assembly required).
For a fully assembled, outdoor-friendly option with GPS that’s about the size of a credit card,
check out the SenseCAP Card Tracker T1000-E for Meshtastic. (note: this does not work with some older meshtatic nodes)
📱 Your Phone
You already have this part!
Minimum requirement: Any smartphone with Bluetooth and the Meshtastic app installed.
OR
Flash the Firmware
Install the latest Meshtastic software
Your new hardware needs the Meshtastic firmware to join the network. Don't worry - it's easier than it sounds!
🔥 Flashing Process:
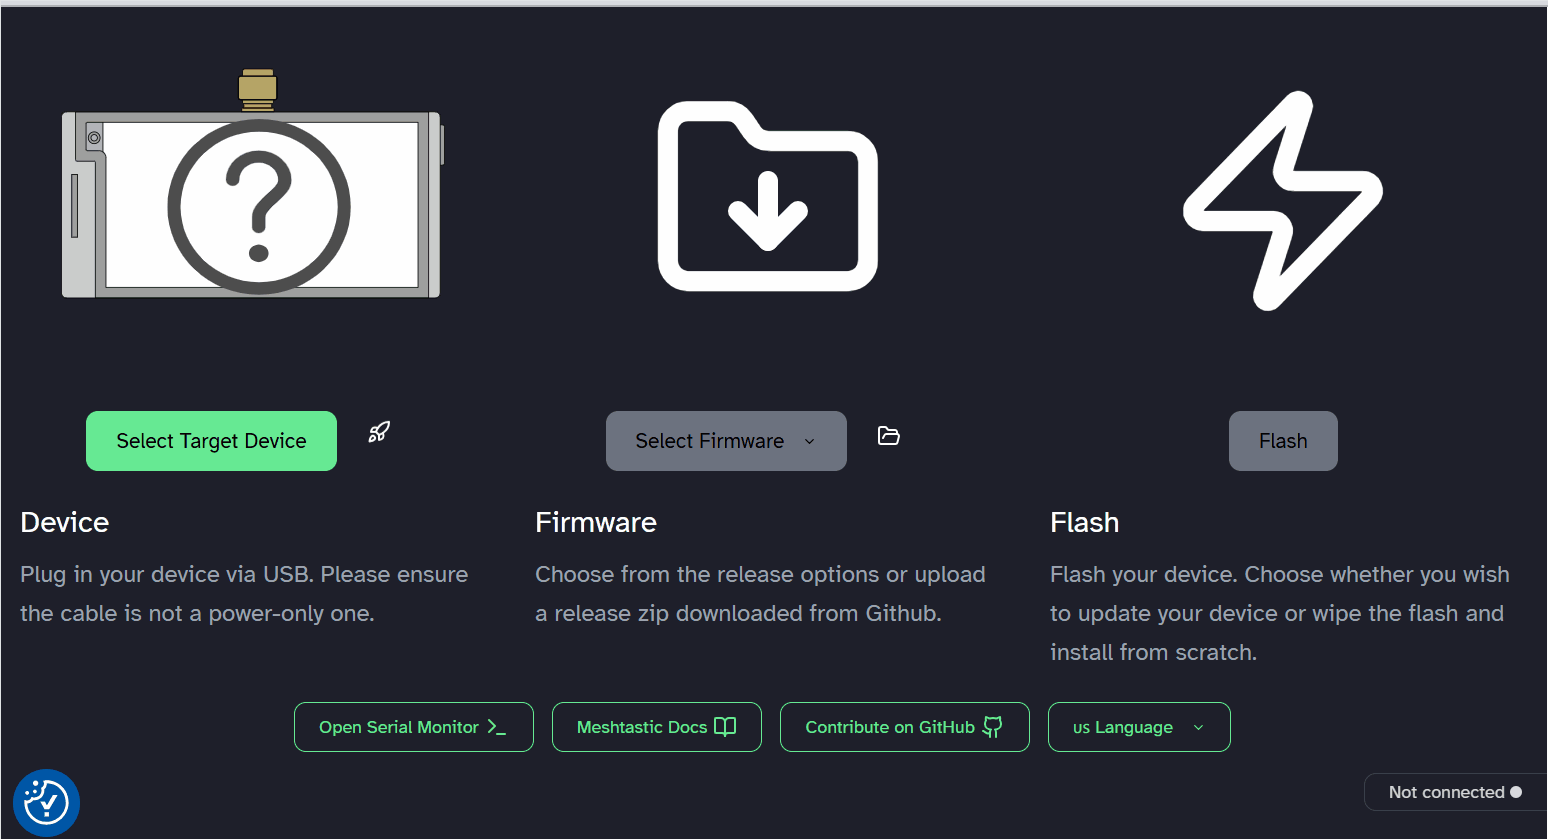
Watch the firmware installation process in action
🔍 When connecting, your device might appear as:
- Windows: "USB-SERIAL CH340" or "CP210x USB to UART Bridge"
- Mac: "/dev/cu.usbserial-*" or "/dev/cu.SLAB_USBtoUART"
- Linux: "/dev/ttyUSB0" or "/dev/ttyACM0"
Don't see your device? Try a different USB cable or check if drivers are needed. The usb cable must be a data cable, not just a charging cable.
Want to be adventurous and run the firmware that's running on Protomesh, cute face and all? Download the LoRabot firmware from my github repo!
Configure Your Node
Set up your radio settings and personalize your node
Once flashed, your node needs some basic configuration to work properly in your region and represent you on the network.
⚙️ Required Configuration:
Watch the region configuration process on Android. In this example the node was already setup so 'SEND' at the end is greyed out.
⚠️ Important: Your device will likely reboot itself after updating the region settings and disconnect. This is normal!
🏷️ Optional: Personalize Your Node
Note: The device may reboot again after name changes. Choose something memorable like... Long: “BuildNSlay” or "🐈⬛🔧GarageCat" and Short: "💅🔧" or "🐈P4W"
Connect & Test
Join the Protomesh network and say hello!
Your node is ready! You have your own personal mesh communication device that works anywhere there are other nodes. Take it with you wherever you go!
Understand Range & Coverage
Know what to expect from your mesh networking range
📡 Range Expectations
Range depends heavily on your environment. Here's what to expect:
🏙️ Urban Areas
0.5 - 2 miles
Buildings, interference, and obstacles reduce range significantly. Perfect for neighborhood networks!
🏘️ Suburban Areas
2 - 5+ miles
Better line-of-sight means longer range. Great for connecting with distant nodes!
⛰️ Rural/Elevated
10+ miles
With clear line-of-sight, you can reach incredible distances!
Remember: Every building, tree, and hill affects your signal. Higher placement = better range!
🤝 Community & Learning Resources
You're joining a global community of mesh networking enthusiasts! Here's where to learn, get help, and connect:
Complete guides and technical documentation 🎓 Multiverse School
Advanced mesh networking education 💬 Discord Community
Chat with other mesh enthusiasts 24/7 🧵 Reddit Community
Share projects and get help 🏙️ Western PA Mesh Network
Local Pittsburgh network, active on discord 📻 Meshtastic First Time Setup Android
Youtube video to walk through setup